Your mold at home, right the first time
Work at a clean sink with good light. What comes out of the tray is the shape your appliance is cut from, so every edge you capture is an edge we can build to.
Steady beats quick, and the box carries putty for a second run.
Stop here if any of this is true
Do not mold over gums that bleed, over a crown or a filling that has worked loose, over a tooth that shifts when you press it, or over a tooth that is badly broken down. Putty sets into a firm grip, and pulling it free can lift a failing tooth with it. Get seen first, then come back to the kit.
We build appliances. Diagnosis and treatment belong to a dentist.
What the kit holds
Black box, gold print, and a QR code inside the lid that opens the video walkthrough.
- Two tray sets, an upper and a lower
- Four putty sets, base and catalyst jars
- A 16 tone shade fan and printed steps
Six steps, start to finish
 1. Brush and rinseA clean tooth prints clean. Brush, work the gap gently, and rinse until nothing sits along the gum line. Film and crumbs copy themselves into the putty.
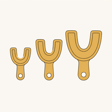 2. Size the trayTry each tray empty first. The one you want reaches every tooth on the arch and still lifts away without pressing into the gums. Dry fit the upper and the lower now, not while putty hardens.
 3. Mix the puttyTake matching scoops from the base jar and the catalyst jar and knead them into one solid shade with no marbling anywhere. Streaks mean part of the tray stays soft. Once the two touch, keep moving.
 4. Seat the trayLine it up over the arch, press it home in one motion, and hold it without rocking. Close gently and keep the pressure even until the putty firms. Any wobble softens the detail we need most.
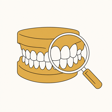 5. Read what you madeLift straight off and study it. Every tooth wants a crisp outline, the gum border wants one clean curve, and nothing should show trapped bubbles or bare tray. Whatever is missing here is missing on the appliance.
 6. Send it onWith both arches done, photographs come before packing. We look the same day, and the box goes out once we have said yes.
Upper and lower, every time
Even when a single arch is getting the appliance, we need the pair. The opposing teeth show us where your bite closes, and without them a new tooth can sit proud and catch when you chew.
Four photos before you mail it
Send them and hold onto the box until you hear from us, which is the same day.
- Straight on, both sides, close on the gap
- Bright light, shade fan next to the gap
- Someone else holds the phone
Mail an unapproved pair and a kit is $40.
A second try is in the box
Nobody is scored on the first go. Spare putty ships in the kit for this reason, so when an edge sits soft or a tooth never printed, mix a fresh set and use the same tray again. If the box runs empty, more putty is $25 and a replacement kit is $40.
Getting the trays back to us
Both trays travel together in one sealed box under the prepaid label. That label is good with a single carrier, the one printed on its face, so the box goes to that carrier and nobody else. Handed to a different one it can be refused or simply disappear. Drop it off before 5 PM Eastern.