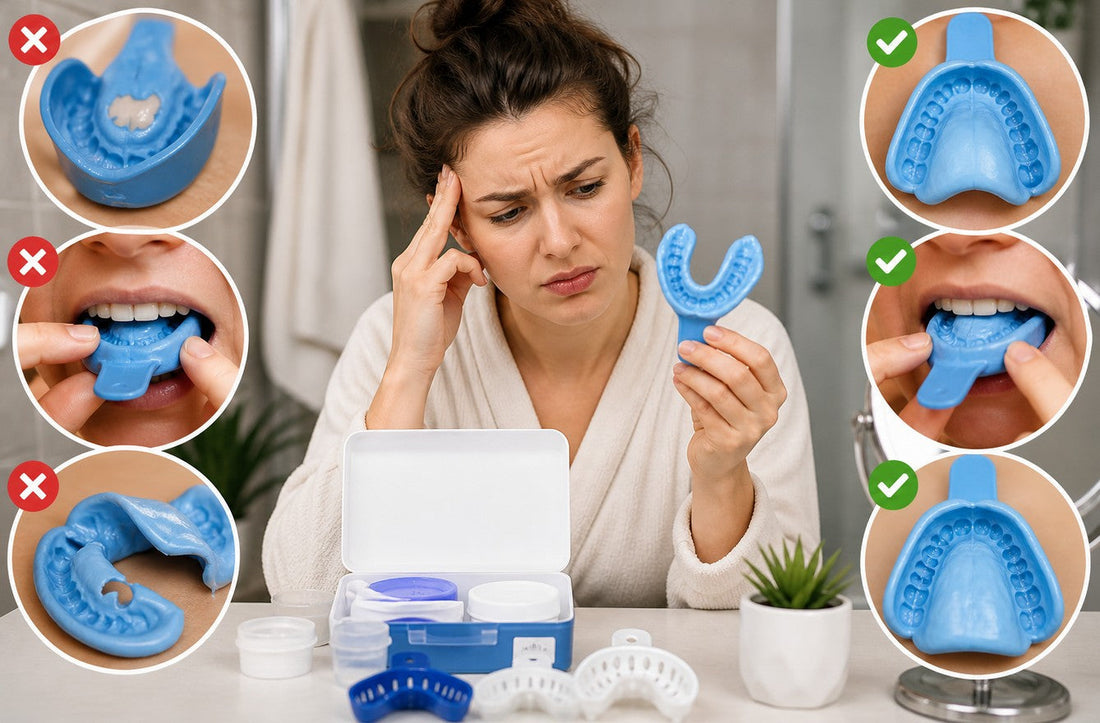
The four mistakes that ruin a home tooth impression
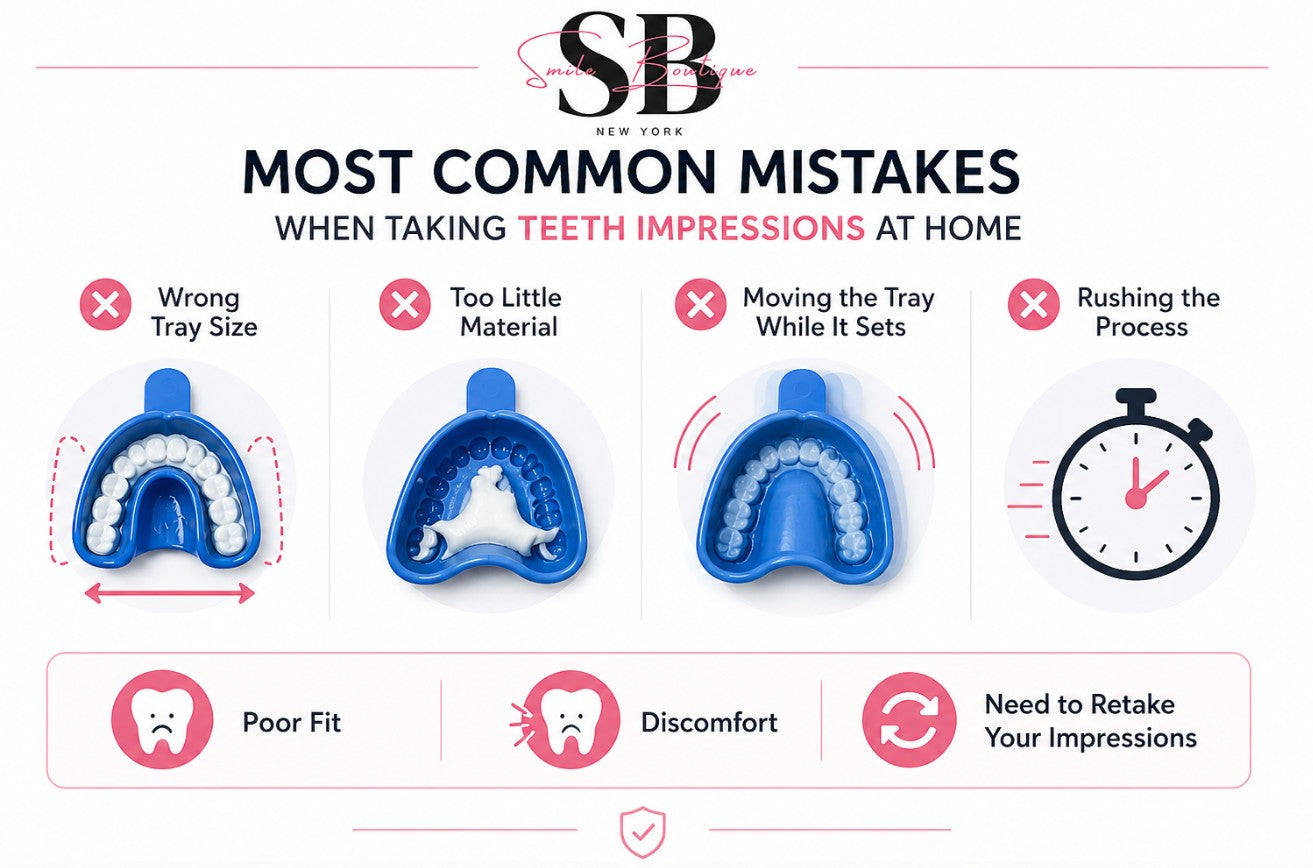
Four small errors ruin most home impressions. The wrong tray size, too little putty, a tray that moves, or pulling it out too soon.
Catch any one of them before you mail the kit back and the lab gets a mold it can build from. Miss it, and the fix is a free replacement kit and another week of waiting.
Why the mold has to be right
Every flipper, partial denture, retainer and set of veneers we make starts from your impression. A blurred edge or a shifted tooth line carries straight into the finished appliance, so ten careful minutes at home save weeks later.
Fix the four common mistakes
 Wrong tray sizeTry every tray dry first. The right one covers all your teeth without pressing on them.
 Too little puttyFill the tray edge to edge and overfill it slightly, so no tooth is left uncovered.
 Moving the trayHold it steady with both hands. Do not talk and do not shift your bite while it sets.
- Rushing the setWait the full setting time. Pull the tray out early and the mold comes out blurred.
Any one of them ends in a poor fit, sore spots or a retake.
How much detail each appliance needs
What your appliance needs from the mold
| Appliance | What the impression must capture |
|---|---|
| Tooth flipper | The exact gap and the teeth right beside it |
| Partial denture | The full arch plus a clean gum line for the clasps |
| Snap-on veneers | Every tooth surface, edge to edge |
| Essix retainer | Full arch with sharp, unbroken tooth outlines |
A short-filled or rushed tray fails all four the same way.
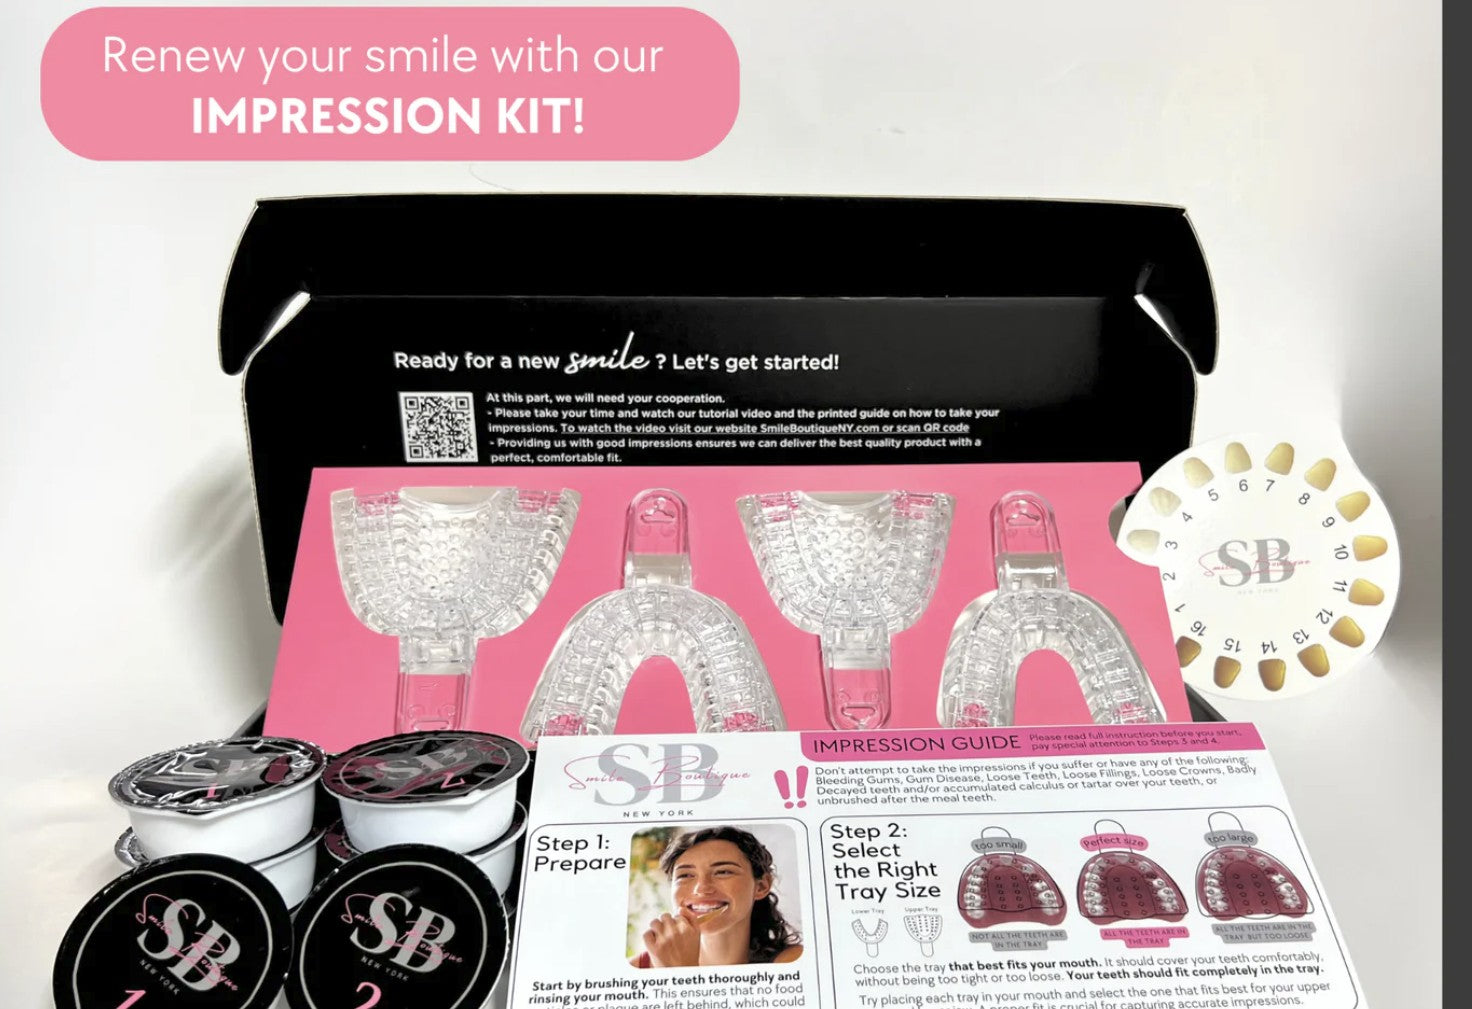
The full process, step by step
The impression kit covers both arches with two tray sizes, so most people find a good fit on the first try.
Your impressions in six steps
 PrepareRinse your mouth, then lay out the trays, both putty tubs and a timer.
- Pick the tray sizeSeat each tray dry. Keep the one that covers every tooth with a little room.
- Mix the puttyKnead both parts together for about 45 seconds, until the color is even.
- Load and seat the trayFill it edge to edge, then press it firmly over your teeth in one move.
 Hold for three minutesStay still until the putty is firm. No talking, no shifting your bite.
 Check and sendLook for clear tooth outlines and a visible gum line, then mail both arches back.
Checking your mold before it ships
Hold both trays up to the light. Every tooth outline should be sharp, the gum line should be visible, and there should be no bubbles or tears near the biting edge.
If one arch looks off, ask us for a free replacement tray rather than mailing a mold you are unsure about. This matters most for snap-on veneers, where every surface has to read clearly.
Frequently asked
What is the most common mistake in a home tooth impression
Picking the wrong tray size. Too small and it misses teeth, too large and the putty shifts while it sets.
How do I know if my impression is good enough to send
Hold both trays to the light. Every tooth outline should be sharp, the gum line should show, and there should be no bubbles or tears.
What happens if I send a bad impression
A technician who cannot read a mold will ask for a retake before building anything, which adds a free replacement kit and a few extra days rather than a bad fit.
Do snap-on veneers need a more precise impression than a flipper
Yes. Veneers cover every tooth surface edge to edge, while a flipper only needs the gap and the teeth right beside it read clearly.
New to the process, start with how to use a teeth impression kit at home. Ordering veneers next, read why impressions matter for snap-on veneers.